
A tool box organization foam allows you to easily and safely store tools in a personalized toolbox layout. There are numerous tool storage systems, from tool storage cabinets to tool box organizer walls.
The tool storage cabinets usually have drawers and a lot of times are made with wheels so you can move them around. A tool box organizer wall is usually a peg board where you install hooks or other supports to safely organize your tools.
Usually, these tool box organization ideas are mainly used in garages or work areas. If you want garden tool storage ideas, you will have to do a bit of research. There are numerous interior designs of storage sheds. These will give you a good idea on how to organize a tool shed efficiently.
If you want a tool storage system that you can easily move around go to our article on storage boxes with wheels and extendable handle. We feature more information on storage containers for tools.
Table of contents
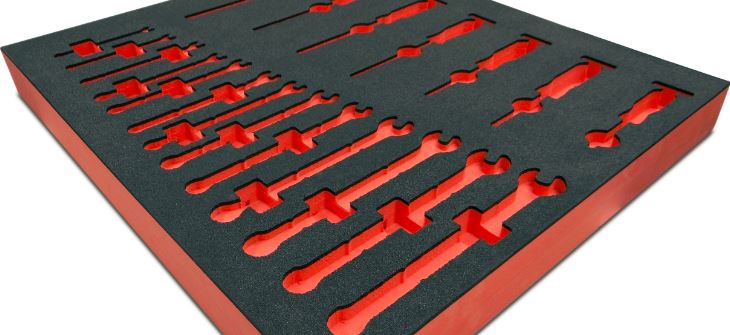
Foam Toolbox organization systems
There are numerous tool box organization ideas. From the cabinets on wheels with drawers to pegboards or even toolbox box organizers. Using foam to organize tools is somewhat newer and doesn’t exclude the first.
This kind of tool storage will work great in a garage, in the workplace or even on special vehicles. In fact, I would recommend it as one of the great truck tool box organization ideas.
Just imagine, they sit well in their place, so the constant movement and vibration you get in a vehicle, will not make them rattle or move around. Because every part has its own place, misplacing them is almost impossible. I would recommend foam storage as the best way to organize an auto toolbox.
If you need it in a garage, even better. Most garages or workplaces I have seen, use drawer cabinets for tools. Some might have personalized holders in each drawer, but you always get that odd moment when you don’t find what you are looking for.
If you empty the drawers and just insert your personalized foam, everything will be very easy to find. Everything should be where you expect them to be. Goodbye to wasting time finding the screwdriver you need.
Making a DIY toolbox organizer from foam
Yes, this is possible. Most foam organizing systems for tools are DIY. There are some for sale, but usually they come included with tools. No one wants that, as everyone has collected their tools over the years and have their optimum mix. Investing in new tools, just for the foam organizer, will never be worth it.
Step 1 – What foam to use for your tool organizer
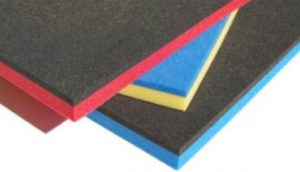
- The standard foam should work just fine in this situation. If you find a foam made from 2 layers of different color you can also get that. It will ease the visibility of missing pieces
- The thickness depends on what you want to store. We think that a thickness of 2 inches should be enough for most hardware hand tools. If you have bigger tools, get a thicker foam.
- Find a foam sheet with self-adhesive on the back. It might seem easy to glue it yourself, but in reality, it’s a hassle which is not worth the effort.
Recommended tool box organization foam
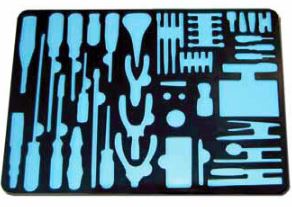
Step 2 – Draw your own tool organization ideas on a piece of large paper
- take each of the tools you want to store and lay them on the paper. Draw around them carefully until you fill it up, or all your tools have their own spot.
- After this is done, truly done, take another good look. If everything seems fine, turn the foam around with the self-adhesive side up.
- The paper you used will be for orientation and to make sure it actually works for you. You can lay the tools directly on the self-adhesive and draw around them, but it’s better to have an overview first.
- Trust us, it’s better to first do it on paper and only when everything is done to draw directly on the back of the foam. It won’t set you back more than 10 minutes.
- Don’t forget to leave space for your fingers, so you can easily pick up the tools from the foam holder.
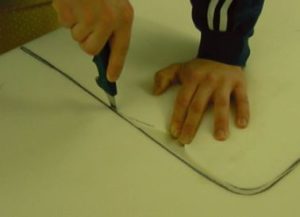
Step 3 – Cutting the foam
- While a normal cutter with a sharp blade should do the trick, we do recommend you use something more advanced. There are high precision hand knives that should work well.
- If you have a special foam cutter, this would be even better. These are usually electric and will go through the foam like butter.
- Be careful so you are more or less cutting the foam precisely. The more you are taking your time with this, the more satisfied you will be.
Step 4 – Adding extra storage spaces
- If you have extra space left on the foam organizer, try and use it to your advantage.
- The first option would be to cut the foam but not go all the way through it. This will create a good space for screws or even nails.
- The second one would be to cut slim foam parts and use them as dividers. This choice should be more suited to heavier tools which need a thicker layer of foam as support.
Step 5 – Laying down the foam and inserting the tools
- Now that everything is cut to size, you should insert the foam organizer into a cabinet or a drawer
- Carefully lay the tools into their holding space and analyze if something needs improving. Because foam is a bit soft, you should not have major problems.
- If you want, you can also mark the places with stickers or pins. This should make it easier for you to quickly retrieve items from the tool organizer.
DIY tool storage ideas
The internet is full of different DIY tool storage plans. The toolbox organization foam is just one part of the story, there are also specialized drawers or even custom pegboards. You will find a lot of options in this sense, from simple things like screw holders to more advanced power tool storage racks.
The most important thing is to decide whether to buy a manufacturer tool organizer or go for a DIY tool storage cabinet or organizer. That is why we will give you some pointers on what to look for when deciding.
- Quality of the storage organizer. This factor is important because you need a decent lifespan for your organizer. Investing in something that isn’t expensive but will only last a short time is not worth it. If you depend on the organizer and use it quite a lot, focus on quality. When you don’t use the toolbox a lot, you can easilly go for lower end ones.
- If you can’t find a high-quality tool storage system, build it yourself. But evaluate the costs before you do. You might find yourself in a situation where it could cost a lot more to make it. There is also the option of buying more organizers for your tools. When one won’t suit you, get a bundle that should. But always compare effort and cost before deciding to build one.
- Is it worth the effort? Analyse if you are the DIY type of person. If you are good at building things and you have a lot of patience, then go for it. If you are not the patient one, just go and buy one that is already built. It will save you time and effort, and won’t frustrate you during the building process.
How useful was this post?
Click on a star to rate it!
Average rating / 5. Vote count: